
Are you constantly bombarded with intrusive ads on your Android device? Do unwanted pop-ups, banner ads, and video ads disrupt your mobile experience? You’re not alone. Millions of Android users struggle with the ever-increasing presence of unwanted advertisements. This article, “Taming the Ad Beast: Effective Strategies to Stop Ads on Your Android Device,” provides a comprehensive guide to reclaiming your digital peace and taking control of your mobile browsing experience. We’ll explore proven ad-blocking strategies, discuss the benefits of using ad blocker apps, and empower you to effectively stop ads and enjoy an uninterrupted Android experience. Learn how to identify the sources of these intrusive ads and implement practical solutions to block ads on your Android device.
From tweaking browser settings and utilizing dedicated ad-blocking software to identifying and removing adware-infected apps, we cover a range of effective strategies to help you tame the ad beast. Whether you’re looking for a simple solution like activating a built-in pop-up blocker or prefer a more robust approach with a powerful third-party ad blocker, this article provides actionable advice and practical tips to effectively stop ads on your Android device. Reclaim your mobile experience and enjoy ad-free browsing, gaming, and app usage. Learn to block ads effectively and take back control of your Android device.
Understanding Different Types of Android Ads
Before combating ads, it’s crucial to understand the various types you encounter on your Android device. This knowledge helps you choose the right ad-blocking strategy.
Banner Ads: These are the most common type, appearing as static or animated images at the top or bottom of the screen. They can be intrusive, but are generally easy to identify.
Interstitial Ads: These full-screen ads appear between app transitions or levels in a game. They can be disruptive, often forcing you to wait before dismissing them.
Native Ads: Designed to blend seamlessly with app content, native ads often mimic the look and feel of articles or social media posts. They can be deceptive, making it harder to distinguish them from regular content.
Video Ads: These can play automatically, often with sound, before, during, or after other video content. They can consume data and disrupt the viewing experience.
Pop-up Ads: These are unwanted ads that suddenly appear in a new browser window, sometimes obstructing the content you were viewing. These can be particularly annoying and difficult to close.
Using Ad Blocker Apps
Ad blocker apps offer a convenient and often effective way to minimize or eliminate ads on your Android device. These apps work by filtering network traffic and blocking connections to known ad servers. They can be particularly useful for blocking ads in apps and games, as well as on websites viewed within mobile browsers.
There is a wide selection of ad blocker apps available on the Google Play Store, each with its own features and capabilities. Some popular options include dedicated ad blockers like AdGuard, Blokada, and AdAway (which may require root access).
When selecting an ad blocker, consider factors like its effectiveness, performance impact on your device, and privacy policy. Some ad blockers can consume more battery power than others, and some may collect data about your browsing habits. It’s important to research and choose a reputable app that aligns with your needs and privacy preferences.
Keep in mind that some apps and websites may detect the use of ad blockers and restrict access to content until the blocker is disabled. In such cases, you may need to decide whether to whitelist the specific app or website or continue using the ad blocker.
Adjusting App Permissions to Limit Ad Tracking
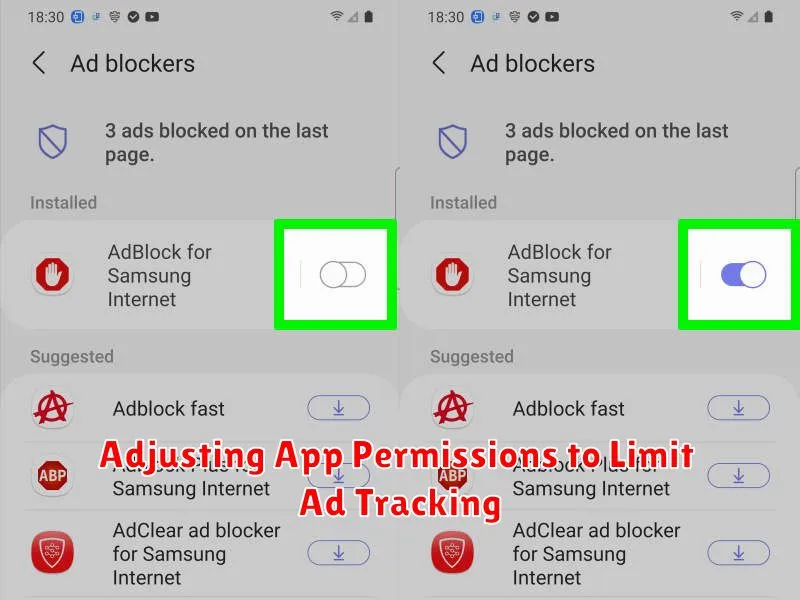
Many apps request access to various device permissions to track your activity for targeted advertising. Limiting these permissions can significantly reduce the amount of personalized ads you see. While this won’t eliminate all ads, it restricts the data apps can collect about your usage patterns.
To manage app permissions:
- Open your device’s Settings.
- Navigate to Apps (or Applications depending on your device).
- Select the app you wish to manage.
- Tap on Permissions.
- Disable permissions related to location, storage, and other trackers that you deem unnecessary for the app’s core functionality.
Permissions such as Location are often used to deliver location-based ads. Storage access can be used to store tracking data. By carefully reviewing and adjusting these permissions for each app, you regain some control over your data privacy and limit the effectiveness of targeted advertising.
Disabling Personalized Ads in Google Settings
Personalized ads, while intended to be relevant, can sometimes feel intrusive. Disabling this feature prevents Google from using your data to tailor ads to your interests. This won’t stop all ads, but you’ll see generic ads instead of those specifically targeted at you.
To disable personalized ads, navigate to your device’s Settings, then find and select Google (or Google Settings depending on your Android version). Look for Ads or a similar setting. Inside this menu, you should find an option labeled “Opt out of Ads Personalization” or “Turn off Ad Personalization.” Enable this option.
You can also reset your advertising ID within this menu. This action disassociates your existing advertising profile from your device, further limiting ad tracking. Note that this does not delete your Google account or prevent data collection entirely. It simply resets the identifier used for personalized advertising.
Modifying Browser Settings to Block Pop-up Ads
Most modern Android browsers offer built-in settings to manage pop-up ads. These settings can usually be found within the browser’s privacy or site settings. Activating the pop-up blocker is a straightforward way to prevent these intrusive ads from interrupting your browsing experience.
While the specific steps may vary slightly depending on the browser, the general process involves opening the browser’s settings menu, locating the “site settings” or “privacy and security” section, and then enabling the pop-up blocker. This action typically blocks the majority of unwanted pop-up ads. Some browsers also allow you to whitelist specific sites, which is useful if a trusted site uses pop-ups for legitimate functionality.
Remember to keep your browser app updated. Developers frequently release updates that improve performance, security, and add new features, including enhancements to pop-up blocking capabilities.
Identifying and Removing Adware Apps
Sometimes, the culprit behind excessive ads isn’t your browser or system settings, but a rogue app installed on your device. Adware apps often disguise themselves as legitimate utilities or games, but their primary purpose is to serve you ads. Identifying these apps is the first step towards reclaiming a peaceful mobile experience.
Look for telltale signs. Does your phone suddenly feel slower? Are you seeing unusual ads appearing in places they shouldn’t, like your home screen or within system apps? Do ads pop up even when you’re not using any apps? These are potential indicators of adware.
Check your recently installed apps. If the ad problem started shortly after installing a particular app, that app is a prime suspect. Review the app’s permissions. Does a simple flashlight app really need access to your contacts or location? Overly broad permissions can be a red flag.
Once you’ve identified a suspicious app, uninstalling it is usually straightforward. Go to your device’s settings, find the app in the app manager, and select “uninstall.” In some cases, adware apps may attempt to prevent uninstallation. If this happens, try booting your device into safe mode and then uninstalling the app.
Exploring Private DNS Options for Ad Blocking
Private DNS servers can offer a streamlined approach to ad blocking by filtering DNS queries at the network level. This means your device won’t even connect to ad servers in the first place, saving data and potentially improving battery life. Many private DNS providers offer built-in ad blocking features, effectively preventing ads from loading in apps and browsers.
To configure a private DNS server on your Android device, navigate to your network settings. The specific location may vary slightly depending on your Android version and device manufacturer, but it’s generally found within Wi-Fi or connection settings. Look for an option labeled “Private DNS” or “Custom DNS.” Here, you’ll enter the hostname of your chosen private DNS provider. Popular options with ad blocking capabilities include AdGuard DNS and NextDNS.
It’s important to choose a reputable private DNS provider that prioritizes your privacy and security. Research different providers to understand their logging policies and performance before making a selection.
Using a Firewall App for Advanced Ad Blocking
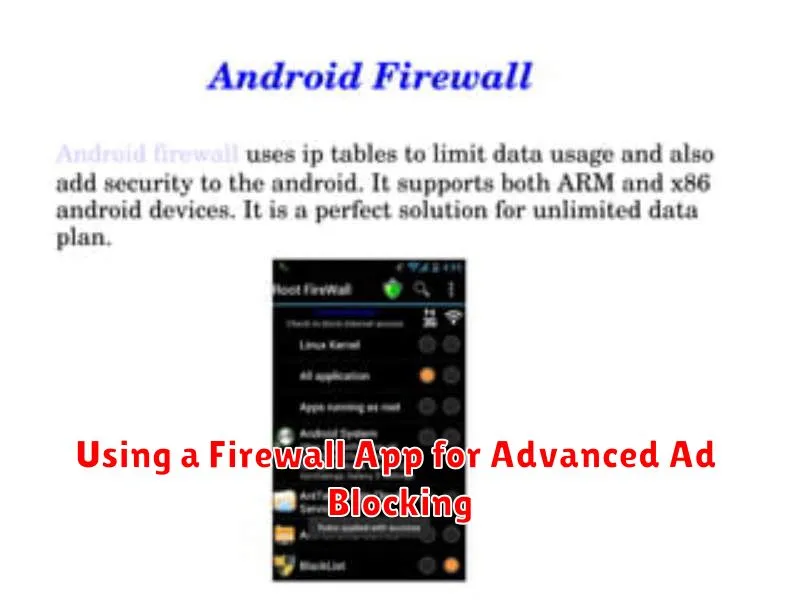
For more advanced ad blocking, consider using a firewall app. These apps provide granular control over network traffic, allowing you to block connections to known ad servers.
Firewall apps work by filtering data packets entering and leaving your device. By configuring rules, you can prevent your apps from communicating with ad networks, effectively stopping ads from loading. Note that this method requires a bit more technical knowledge compared to other ad-blocking solutions.
Several firewall apps are available on the Google Play Store, some offering free versions with limited features and others providing more advanced functionalities through paid subscriptions. Be sure to research and choose a reputable app that meets your needs.
Important considerations: While powerful, firewall apps can sometimes interfere with legitimate app functionality if configured incorrectly. Start with pre-defined rules and carefully adjust settings to avoid unintended consequences. Also, be aware that some firewall apps require root access for full functionality.