
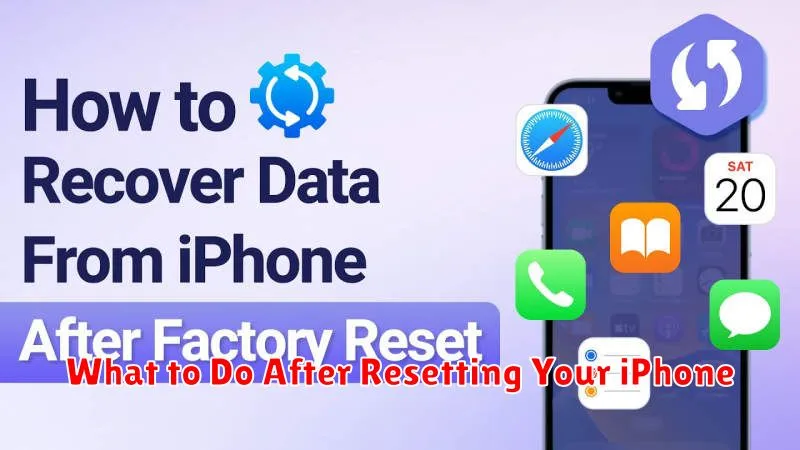
Has your iPhone become sluggish, glitchy, or plagued with persistent software issues? Are you preparing to sell or give away your device and need to erase all your personal data? A factory reset is often the most effective solution. This comprehensive guide will walk you through the process of how to reset your iPhone, providing a step-by-step approach to restoring its factory settings. Whether you’re troubleshooting problems or ensuring your privacy, this article offers clear and concise instructions to help you successfully reset your device.
Learning how to reset your iPhone is a valuable skill for any iPhone owner. This guide covers various reset options, from a simple restart to a full factory reset, explaining the implications of each. We will detail the necessary precautions to take before initiating a reset, such as backing up your data, and provide clear instructions for performing a reset through both your iPhone’s settings and using a computer. By following these instructions, you can confidently restore your iPhone to factory settings, resolving software problems, protecting your privacy, and preparing your device for a new owner or a fresh start.
Understanding Different iPhone Reset Options
Before you reset your iPhone, it’s crucial to understand the different reset options available and choose the one that best suits your needs. Each option has varying effects on your data and device.
Reset All Settings:
This option reverts all your iPhone’s settings back to their defaults, including Wi-Fi passwords, display brightness, notification settings, and other personalized configurations. It does not delete your data, such as photos, apps, or music.
Erase All Content and Settings:
This is a full factory reset. It erases all data and settings on your iPhone, returning it to its original state as if it were brand new. This is the option typically used when selling or giving away your device.
Reset Network Settings:
This option resets all network-related settings, including Wi-Fi networks and passwords, cellular settings, VPN, and APN settings. It’s useful for troubleshooting network connectivity issues.
Reset Keyboard Dictionary:
This resets any learned words or corrections you’ve added to your keyboard’s dictionary. It’s helpful if you’ve accidentally added incorrect words or want to start fresh with the keyboard’s predictions.
Reset Home Screen Layout:
This option restores the default arrangement of app icons on your home screen. It does not delete any apps, just reorganizes them.
Reset Location & Privacy:
This resets all location services and privacy settings back to their defaults. You’ll need to grant apps permission to access your location again.
Backing Up Your iPhone Before Resetting
Before you reset your iPhone, it’s crucial to back up your data. Resetting your iPhone erases all data and settings, returning it to its original factory state. A backup ensures you can restore your personal information, apps, and settings after the reset process is complete.
You have two primary backup options: iCloud and your computer (using Finder for macOS Catalina or later, or iTunes for older macOS versions and Windows).
iCloud Backup
iCloud Backup is a convenient, automatic option. Ensure you’re connected to Wi-Fi and have enough iCloud storage.
Computer Backup
Connecting your iPhone to your computer offers a faster, local backup solution. This method is particularly beneficial for users with limited iCloud storage or large amounts of data.
Regardless of your chosen method, confirm the backup is completed successfully before proceeding with the reset. A successful backup provides peace of mind, knowing your valuable data is safe.
Steps to Reset Your iPhone Through Settings
Resetting your iPhone through the Settings app is the most common and straightforward method. Ensure your device is sufficiently charged before proceeding.
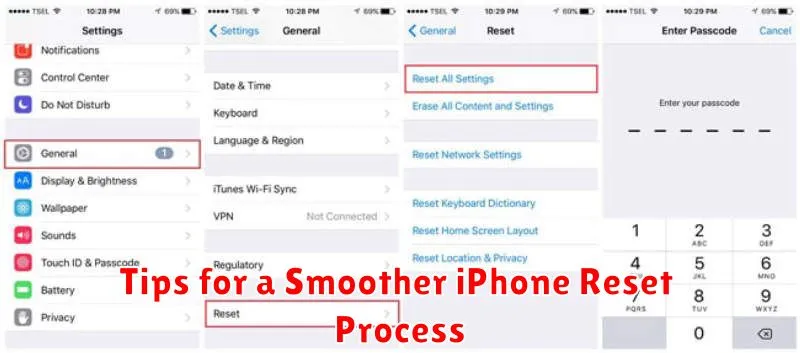
First, open the Settings app. It’s the gray icon with gears, typically found on your home screen.
Next, tap on General. This will open a new menu with various device settings.
Scroll down and tap on Transfer or Reset iPhone. This option allows you to transfer data to a new iPhone or erase all content and settings.
Tap Erase All Content and Settings. This is the option to perform a factory reset.
You may be prompted to enter your device passcode or Apple ID password for security verification. Follow the on-screen instructions to complete the reset process. Your iPhone will restart and display the initial setup screen once the reset is finished.
How to Reset a Locked or Unresponsive iPhone using iTunes/Finder
If your iPhone is locked or unresponsive, preventing access through the Settings app, you can reset it using iTunes (for Windows PCs and older Macs) or Finder (for macOS Catalina and later). This method requires a computer with the necessary software.
Connect your iPhone to the computer. Use the appropriate USB cable.
Open iTunes or Finder. The iPhone should be recognized by the software.
Put your iPhone into recovery mode. This process varies depending on your iPhone model. Consult Apple’s support website for instructions specific to your device. It typically involves a combination of button presses while connecting to the computer.
Once in recovery mode, iTunes/Finder will present an option to Restore or Update. Choose Restore to erase the device and install the latest iOS version.
Follow the on-screen prompts. The process will take some time, so ensure your computer remains connected to the internet and the iPhone is not disconnected.
Restoring Your iPhone from a Backup
After resetting your iPhone, you’ll have a clean slate. To restore your personalized settings, apps, and data, you can restore from a backup. You’ll be prompted to do this during the setup process after the reset completes.
You’ll have the option to restore from an iCloud backup or a computer backup (created with iTunes or Finder). Choose the backup you prefer and follow the on-screen instructions. Ensure your iPhone is connected to a stable Wi-Fi network if restoring from an iCloud backup, or connected to your computer if restoring from a computer backup.
The restoration process can take some time, depending on the size of your backup. Do not disconnect your iPhone from the power source or computer during this process.
Once the restoration is complete, your iPhone will restart and display your familiar home screen with your apps and data restored. You may need to sign in to your Apple ID and other accounts.
Troubleshooting Common iPhone Reset Issues
Occasionally, you might encounter issues during the reset process. Here are some common problems and their solutions:
iPhone Won’t Turn On After Reset
If your iPhone refuses to power on after a reset, ensure it’s charged. Connect it to a power source for at least an hour. If it still doesn’t respond, try a forced restart (consult your specific model’s instructions for the correct button combination). If the problem persists, contact Apple Support.
Reset Gets Stuck or Takes Too Long
A reset can take time, especially if you have a lot of data. However, if it seems excessively long (more than an hour) or appears frozen, try a forced restart. If the reset continues to hang, connect your iPhone to a computer and try restoring it through iTunes/Finder.
Error Messages During Reset
If you encounter error messages during the reset process, note the specific error code. Searching online for the error code can often provide specific solutions. If you can’t find a solution or the error persists, contact Apple Support.
What to Do After Resetting Your iPhone
After resetting your iPhone, you’ll be greeted with the “Hello” screen, signaling the initial setup process. This is where you’ll configure your device as if it were brand new.
You’ll be presented with options for language, region, and Wi-Fi network. Connecting to Wi-Fi is crucial for activating your iPhone and proceeding with the setup.
Next, you’ll choose how to set up your device. You can restore from an iCloud backup, restore from a computer backup (using Finder or iTunes), transfer directly from another iPhone (Quick Start), or set up as a new iPhone. If you have a backup, choose that option to retrieve your data.
You’ll then be prompted to sign in with your Apple ID. This is important for accessing your iCloud services, App Store purchases, and other Apple features. If setting up as new, you can create a new Apple ID or skip this step for now.
Finally, you can configure features like Screen Time, Siri, and Apple Pay. Once completed, your iPhone will be ready to use.
Tips for a Smoother iPhone Reset Process
Ensure you have a stable internet connection throughout the reset process, especially if backing up to iCloud or restoring from a backup. A poor connection can interrupt the process and lead to errors.
Fully charge your iPhone before initiating a reset. The reset process can consume significant power, and a depleted battery can cause the process to halt unexpectedly.
Keep your iPhone connected to the power source during the entire reset procedure, even if fully charged initially. This prevents any power-related interruptions.
If restoring from an iCloud backup, ensure sufficient iCloud storage space is available. A full iCloud drive can prevent successful restoration.
Be patient. The reset process, particularly backing up and restoring, can take a considerable amount of time depending on the amount of data on your device.